From signup to your first returning guest: a DineSend guide
A step-by-step guide to joining DineSend, setting up your restaurant, creating an offer, sharing your QR code, and helping your team redeem coupons.
You do not need a long guest list to get started. The first step is smaller: set up your restaurant, choose a clear offer for a future visit, and give guests a simple way to claim it.
This guide walks through that process, from creating your account to checking a coupon at the till. We use The Cedar Table, a fictional restaurant, throughout.
Before you begin
Have these details ready:
- Your invited account email and access to its inbox.
- Your restaurant's name and business address.
- The restaurant's local time zone.
- A reply email address your team checks, with access to that inbox too.
- One offer you are comfortable honoring, including its minimum spend and conditions.
No card is required to create your account. The 30-day restaurant trial starts with your first live offer, rather than when you first register. Publishing a local test offer does not start a real trial.
You can follow the whole guide or jump to a step:
- Create your account
- Add your restaurant
- Complete the setup checks
- Create your first offer
- Share the signup link and QR code
- Understand what your guest sees
- Invite your team
- Practice and redeem a coupon
- Read your results
1. Create your account
Open Create account and register with the email address you were invited to use.
For email signup, enter Your name, Email address, and a Password of at least 12 characters, then select Create account. Open the verification email, follow its link, and sign in.
If Continue with Google is available, you can use the invited Google account instead. The screenshots follow the email signup route; Google is disabled in this local demonstration.
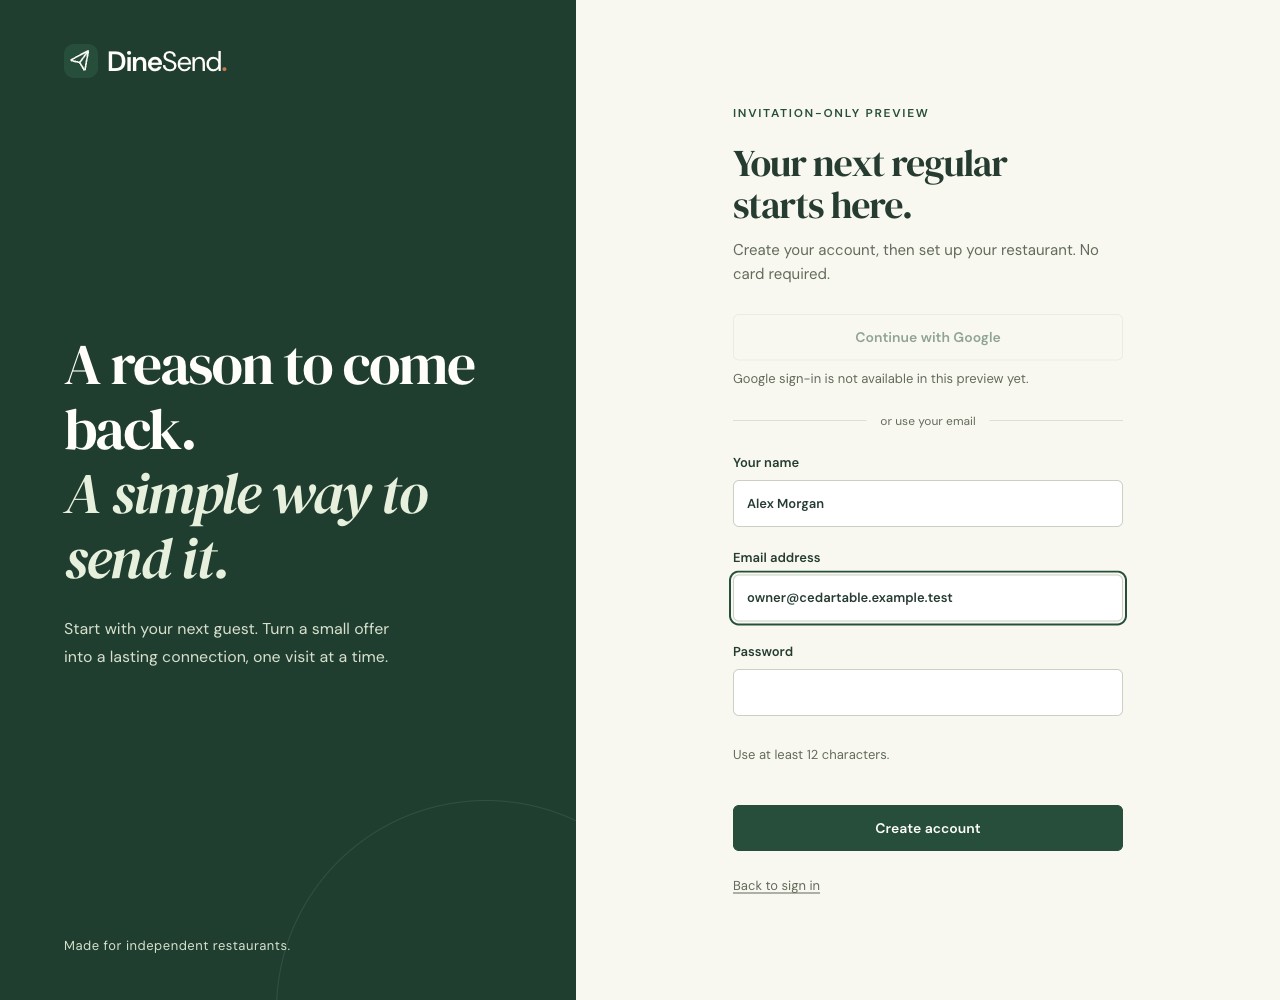
The account belongs to you as the owner. You will enter the restaurant's details after signing in.
Click the image to see it at full size.If you see an invitation-only message, check that you are using the exact invited email address. If you are not yet invited, arrange access with DineSend before continuing.
2. Add your restaurant
After signing in, open Restaurant setup. Fill in the four fields under Restaurant details:
| Field | What to enter |
|---|---|
| Restaurant name | The name your guests recognize. |
| Street address | Your real business address; it appears in restaurant emails. |
| Store time zone | The restaurant's local time zone, which determines coupon dates. |
| Reply email | A working inbox where guests can reach your restaurant. |
Select Save restaurant. Your account email and reply email can be different: one is for signing in, while the other is the address guests use to reply.
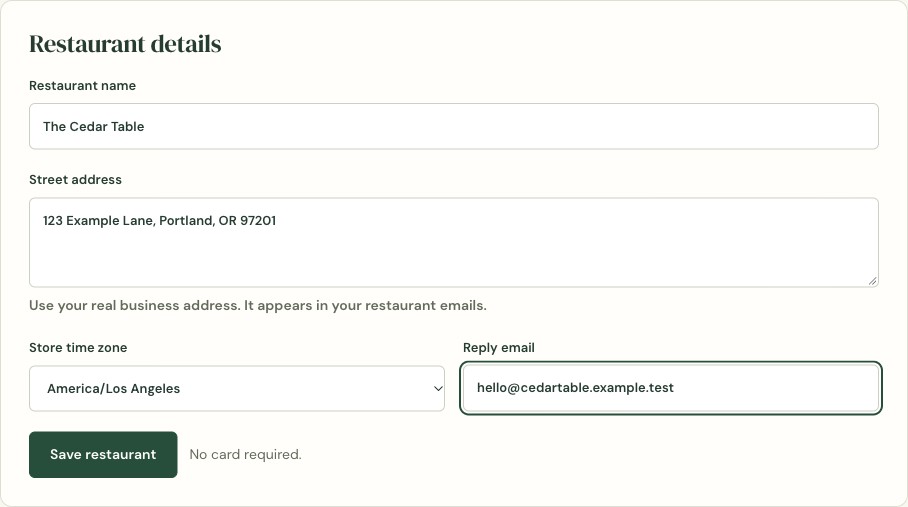
Choose the time zone for the restaurant itself, especially if you manage it from another location.
Click the image to see it at full size.Once saved, you can also upload an optional restaurant logo in A familiar face. You can return to Restaurant setup to update your business details later.
3. Complete the setup checks
The Before your first offer checklist shows what is ready and what still needs attention.
First, select Verify reply email. Open the link sent to that inbox and select Verify reply email on the confirmation page. This verifies the restaurant's reply address separately from your account email.
Then check the Sending setup status. If it is pending, finish setup with DineSend before sharing a live offer with guests. Once your reply address is verified, Send setup test is available; use it when sending is ready and confirm that the test reaches the reply inbox.
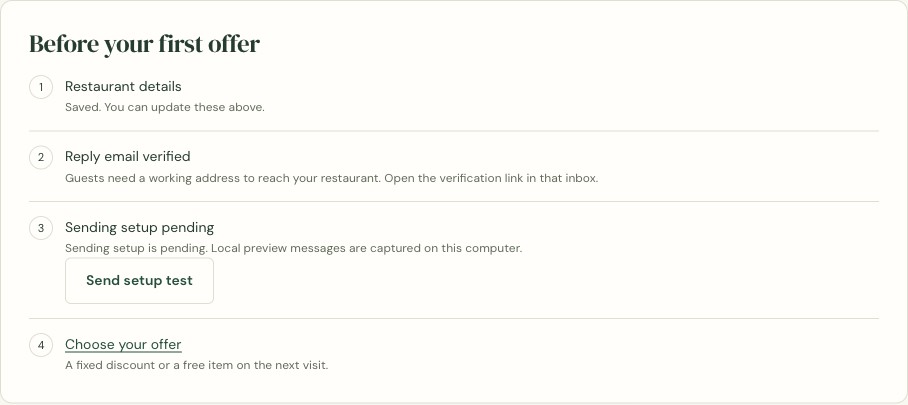
The reply email is verified in this example, but sending setup is still pending. A saved restaurant is not the same as a restaurant ready for live sending.
Click the image to see it at full size.4. Create your first offer
Open Your offer. Start with one offer your team can explain in a sentence. The current choices are Fixed amount off and A free item.
For our example, The Cedar Table chooses:
- Discount amount: $5.00.
- Minimum spend: $20.00.
- Conditions: Dine-in only. One coupon per visit. Cannot be combined with other offers.
Enter your own values and review the Guest preview underneath the form. Make restrictions specific enough that both guests and staff know what to expect.
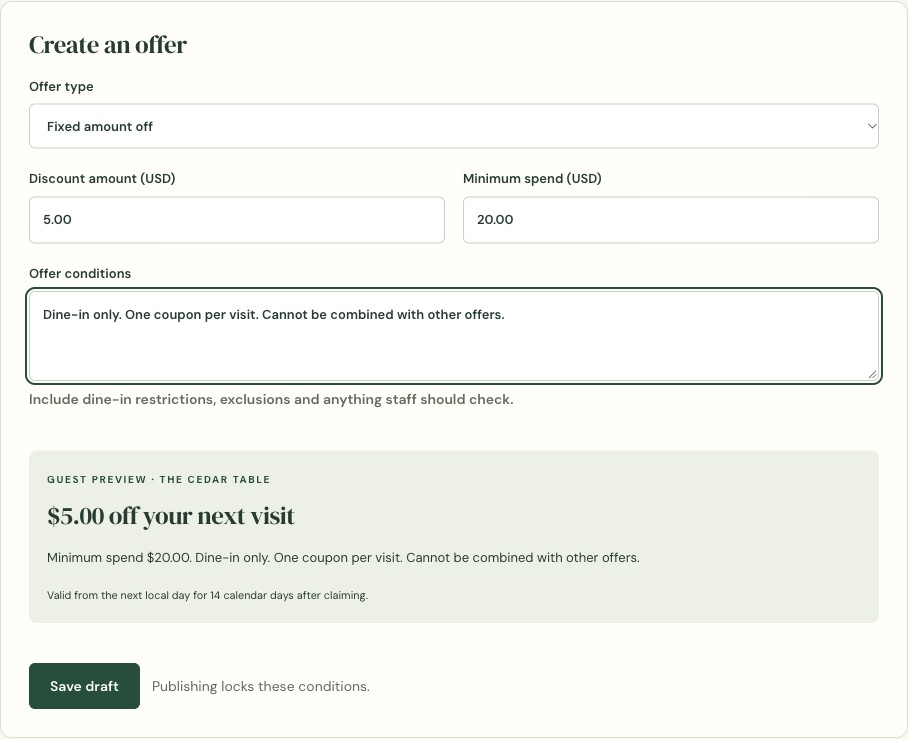
Check the guest-facing wording before saving. The preview updates as you change the offer.
Click the image to see it at full size.Select Save draft, review the saved offer, and use its edit control if anything needs changing. When your live workspace is ready, select Publish offer.
Publishing locks the offer conditions for issued coupons. If you want different terms later, prepare a new offer rather than changing the promise already made to guests. Only one offer can be active at a time.
5. Share the signup link and QR code
After publishing, the offer card provides three useful actions:
- View guest page opens the page guests will see.
- Download QR code saves an image you can place on your own materials.
- Printable offer opens a printable version with the offer details.
Test your own guest page before printing anything. Check the restaurant name, discount or free item, minimum spend, and conditions.
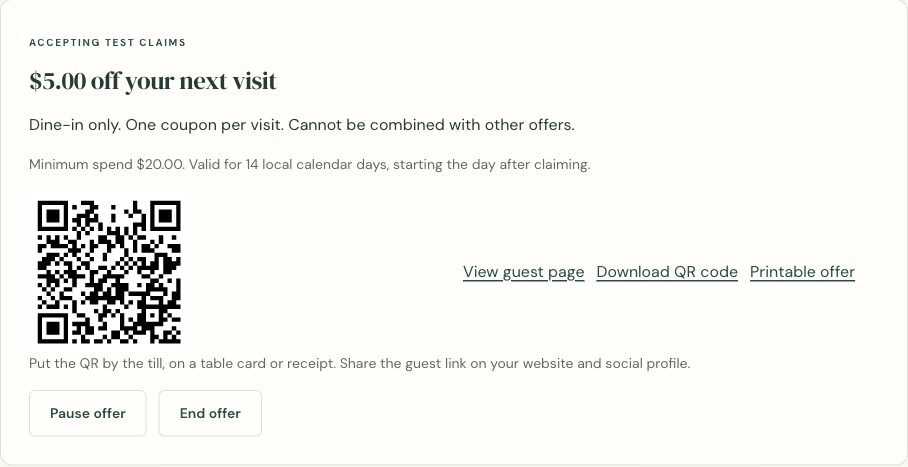
Your live workspace generates its own guest link and QR code. Do not print or reuse the demonstration QR code pictured here.
Click the image to see it at full size.Once the live offer is ready, put the QR where a guest can comfortably scan it: on a table card, by the till, or on a receipt. Share the guest-page link on your website or social profile too.
A short explanation is enough: “Scan here to claim an offer for your next visit.” Let guests make the choice themselves.
6. Understand what your guest sees
Guests do not need a merchant account. They open the guest page, enter their email address, and select Send verification link.
The marketing checkbox starts unchecked. A guest can claim the coupon without subscribing to occasional offers or the unused-coupon reminder. Claiming an offer and choosing marketing are separate actions.
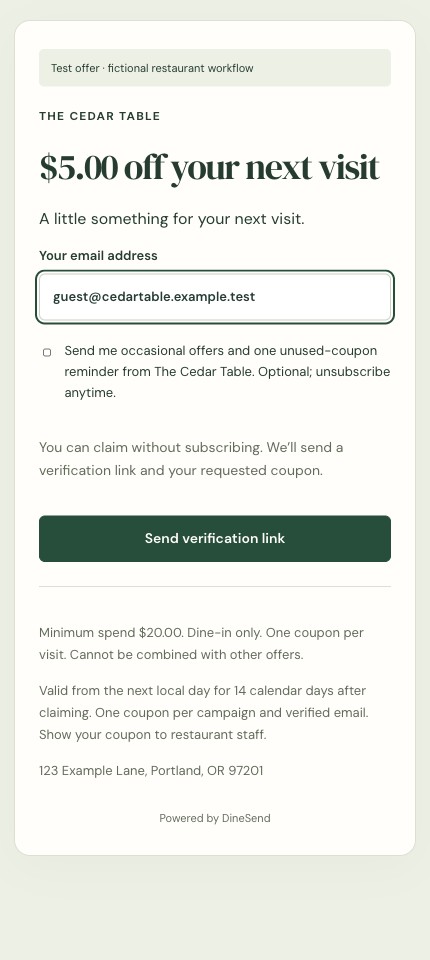
The guest can request their coupon while leaving the marketing option unchecked.
Click the image to see it at full size.The guest then opens the verification email and selects Confirm my email and claim offer. After confirmation, DineSend shows their individual coupon code and its valid dates.
The offer is for a future visit: the coupon becomes valid on the next local day and runs for 14 local calendar days. A Not valid yet message on the day of claiming is expected. Ask guests to check the exact dates shown on their coupon.
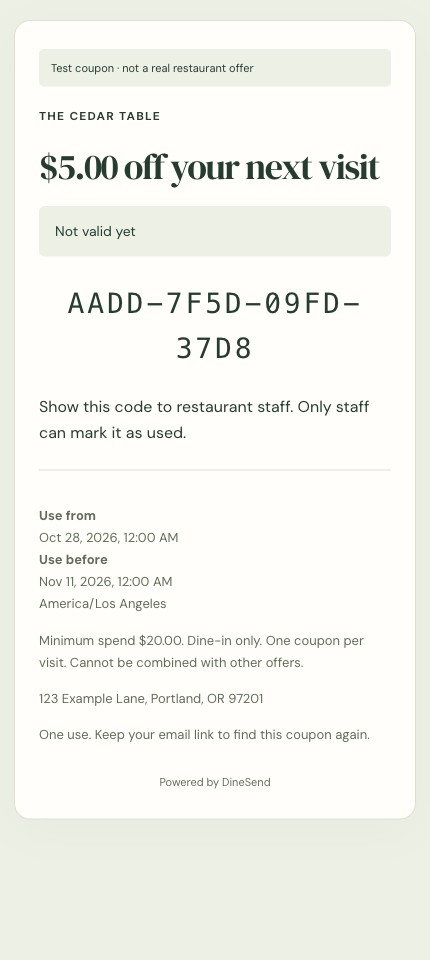
Each guest receives their own code. This fictional coupon shows why staff should check both its status and its dates.
Click the image to see it at full size.7. Invite your team
Open Your team. Enter the email address a staff member will use to sign in, then select Send invitation.
The staff member follows the invitation, signs in with that email address, verifies their account if needed, and accepts the invitation. Invitations expire after 48 hours, so send them when your team has time to complete the steps.
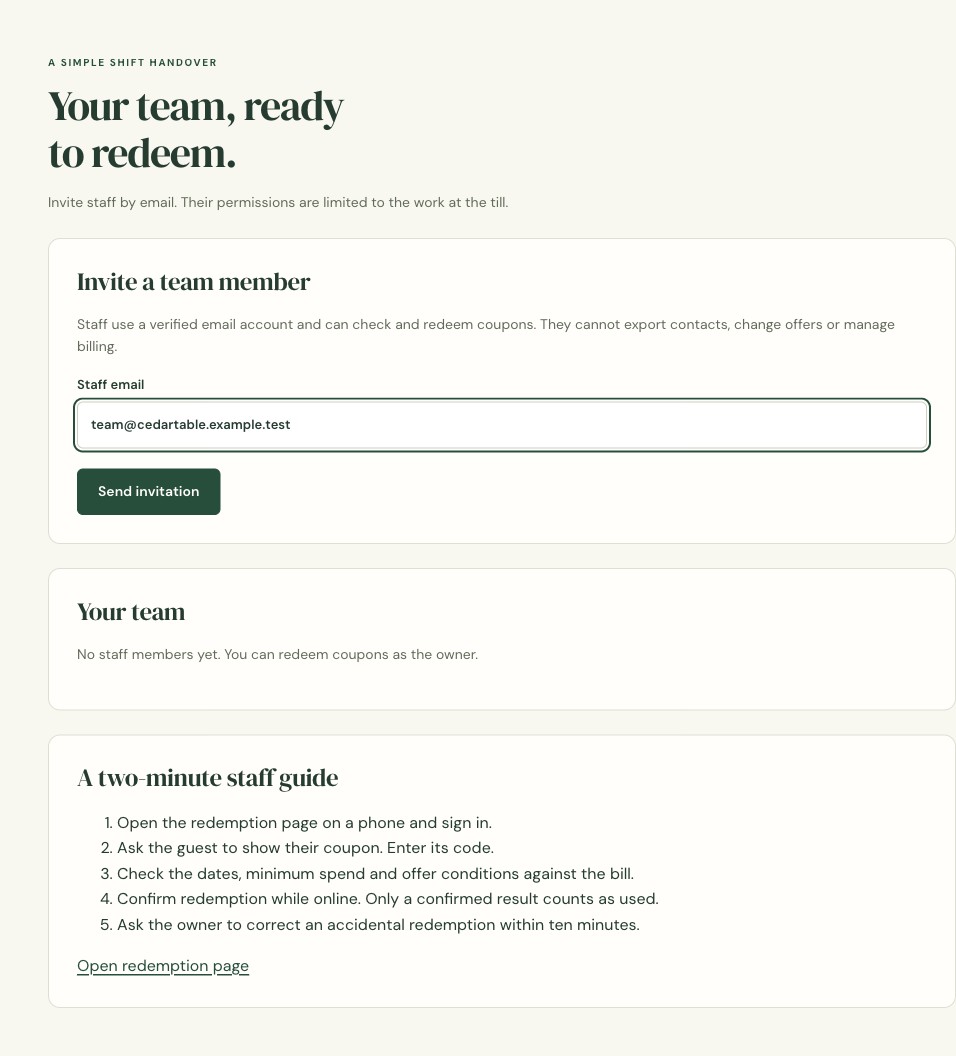
Invite each person using their own email. The restaurant owner can also redeem coupons without a separate staff invitation.
Click the image to see it at full size.Staff access is limited to checking and redeeming coupons. Staff cannot export contacts, change offers, or manage billing. Use individual accounts instead of sharing the owner's sign-in.
8. Practice first, then redeem at the till
Before a busy shift, open Redeem coupons and expand Try a practice redemption. Select Practice redeem to try the flow. Practice does not issue or use a real coupon.
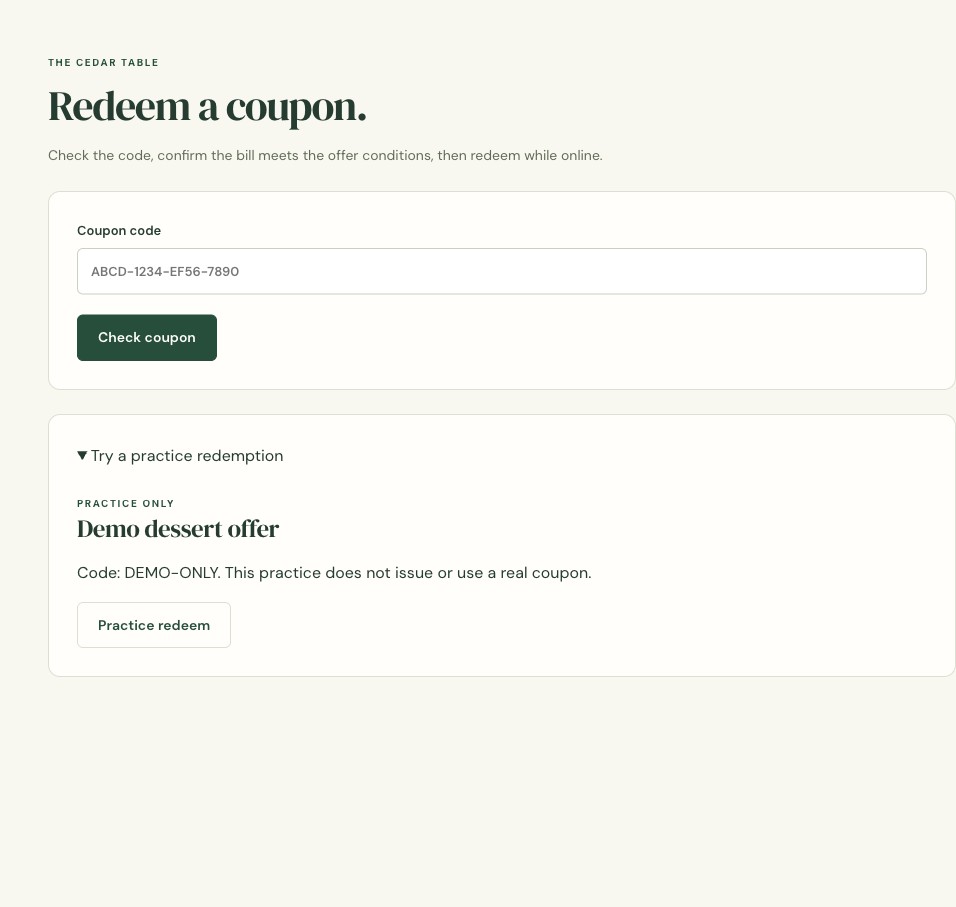
Use practice mode for a shift handover. The DEMO-ONLY example is separate from the real coupon lookup above it.
Click the image to see it at full size.For an actual returning guest:
- Sign in and open Redeem coupons while online.
- Enter the guest's Coupon code and select Check coupon.
- Confirm that the status is Valid coupon and the bill meets the minimum spend and conditions.
- Tick I checked the offer conditions and minimum spend.
- Select Redeem coupon and wait for Coupon redeemed.
- Apply the discount or free item to the bill in your checkout system.
Recording redemption in DineSend does not change the bill in your till or POS. If your connection drops before confirmation, check the coupon again when you are back online before assuming it was redeemed.
For an accidental redemption, the owner can use Undo redemption once per coupon, within ten minutes, and must record a reason. This keeps the original coupon dates; it does not create a new offer.
9. Read your results and keep your promises
Open Results to see verified claimants, marketing subscribers, coupons issued and redeemed, expired unused coupons, and delivery failures.
Read Verified claimants and Marketing subscribers separately: someone can verify their email and claim a coupon without opting into marketing.
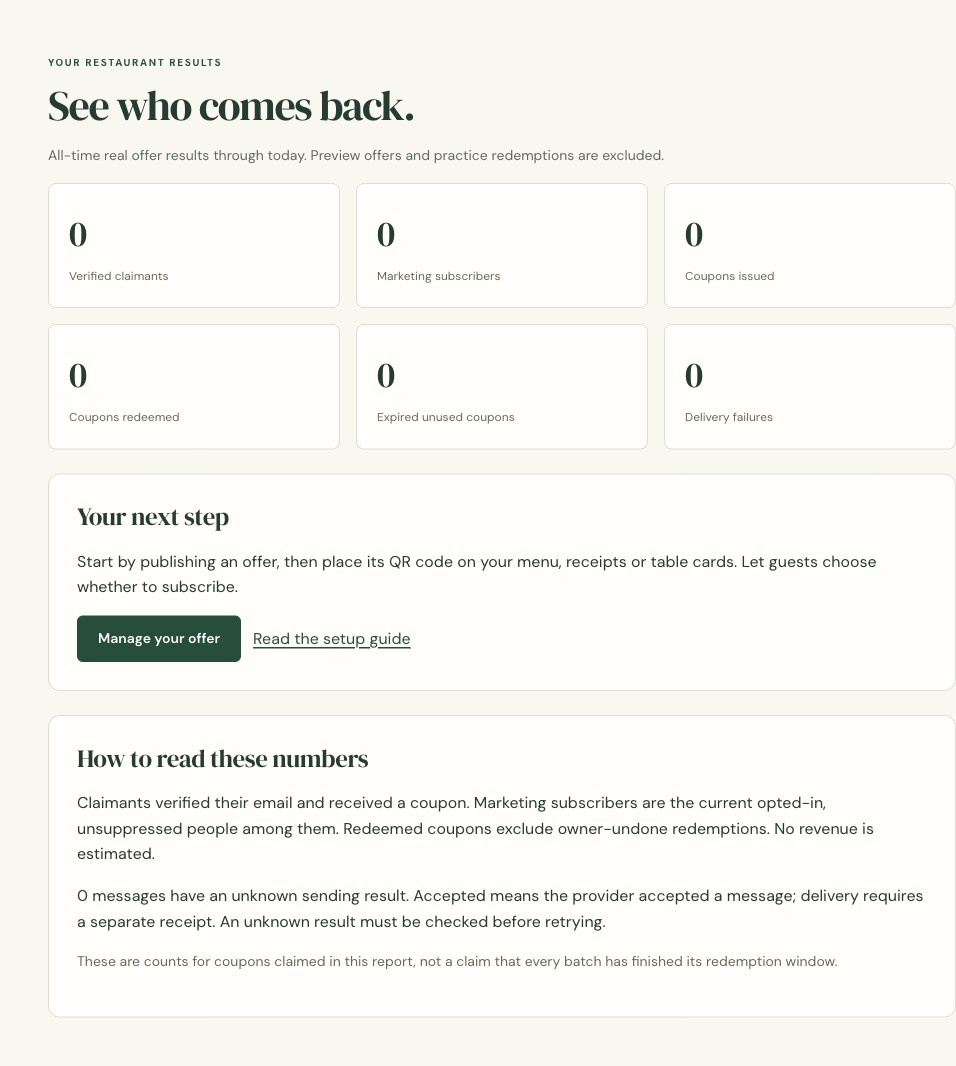
Preview offers and practice redemptions are excluded, so the demonstration activity in this guide leaves these real-offer counters at zero.
Click the image to see it at full size.Use Contacts to review current permission status and export a CSV. Use Data controls for personal-data requests, and Billing to review your plan and any actions available in your workspace. Paid checkout remains unavailable in the current private preview.
If you need to stop new claims, use Pause offer. End offer closes the offer. Existing issued coupons keep their original dates, so tell your team to continue honoring valid coupons even after you stop accepting new claims.
Your first-shift checklist
Before putting a live QR code in front of guests, check that:
- You can sign in with your own verified account.
- The restaurant name, address, reply email, and time zone are correct.
- The reply email is verified and live sending is ready.
- The offer preview matches what your team will honor.
- The QR code opens your restaurant's live guest page.
- Your staff can sign in, complete practice, and explain when coupons become valid.
- Everyone knows that DineSend records redemption and the offer is applied to the bill separately.
Start with one clear offer and one place to share it. You can find the in-product version of the instructions in Help, or return to Restaurant setup whenever you need to check your progress.